How to use the API to import stories into PubGen
Automate your story imports with PubGen's API. Learn how to structure files, obtain upload URLs, and use a sample bash script for efficient content management. Streamline your newsroom workflow today.
Key Takeaways:
1. Automate your story and asset imports with PubGen's API.
2. Follow a structured file format for seamless integration.
3. Utilize a sample bash script for efficient automation.
Streamlining Content Management with PubGen
In the fast-paced world of content management, efficiency is key. PubGen, an AI-enabled CMS platform, offers a robust solution for local newsrooms looking to streamline their story and asset imports. Automating this process not only saves time but also ensures consistency and accuracy. Here, we delve into the API-based method for importing stories into PubGen, making your workflow smoother and more efficient.
Preparing Your Files for Import
To get started, it's crucial to organize your files correctly. The import process requires a specific structure:
- Root Directory: This is where your XML files should be placed.
- Assets Subdirectory: All associated media files, such as images, should be stored in an `assets` folder.
Here's how you can create the necessary zip file:
1. Organize Files: Place all XML files in the root directory and media files in the `assets` subdirectory.
2. Create Zip File: Use command-line tools to zip the directory. This ensures that your files adhere to the NITF standard in XML format.
Example Command:
```bash
zip -r files.zip ./
```
Obtaining the Upload URL and Asset ID
Before you can upload your files, you need to obtain an upload URL and an asset ID. Here's how:
1. Locate Your Auth Token: Find your authentication token in the settings section of the PubGen dashboard.
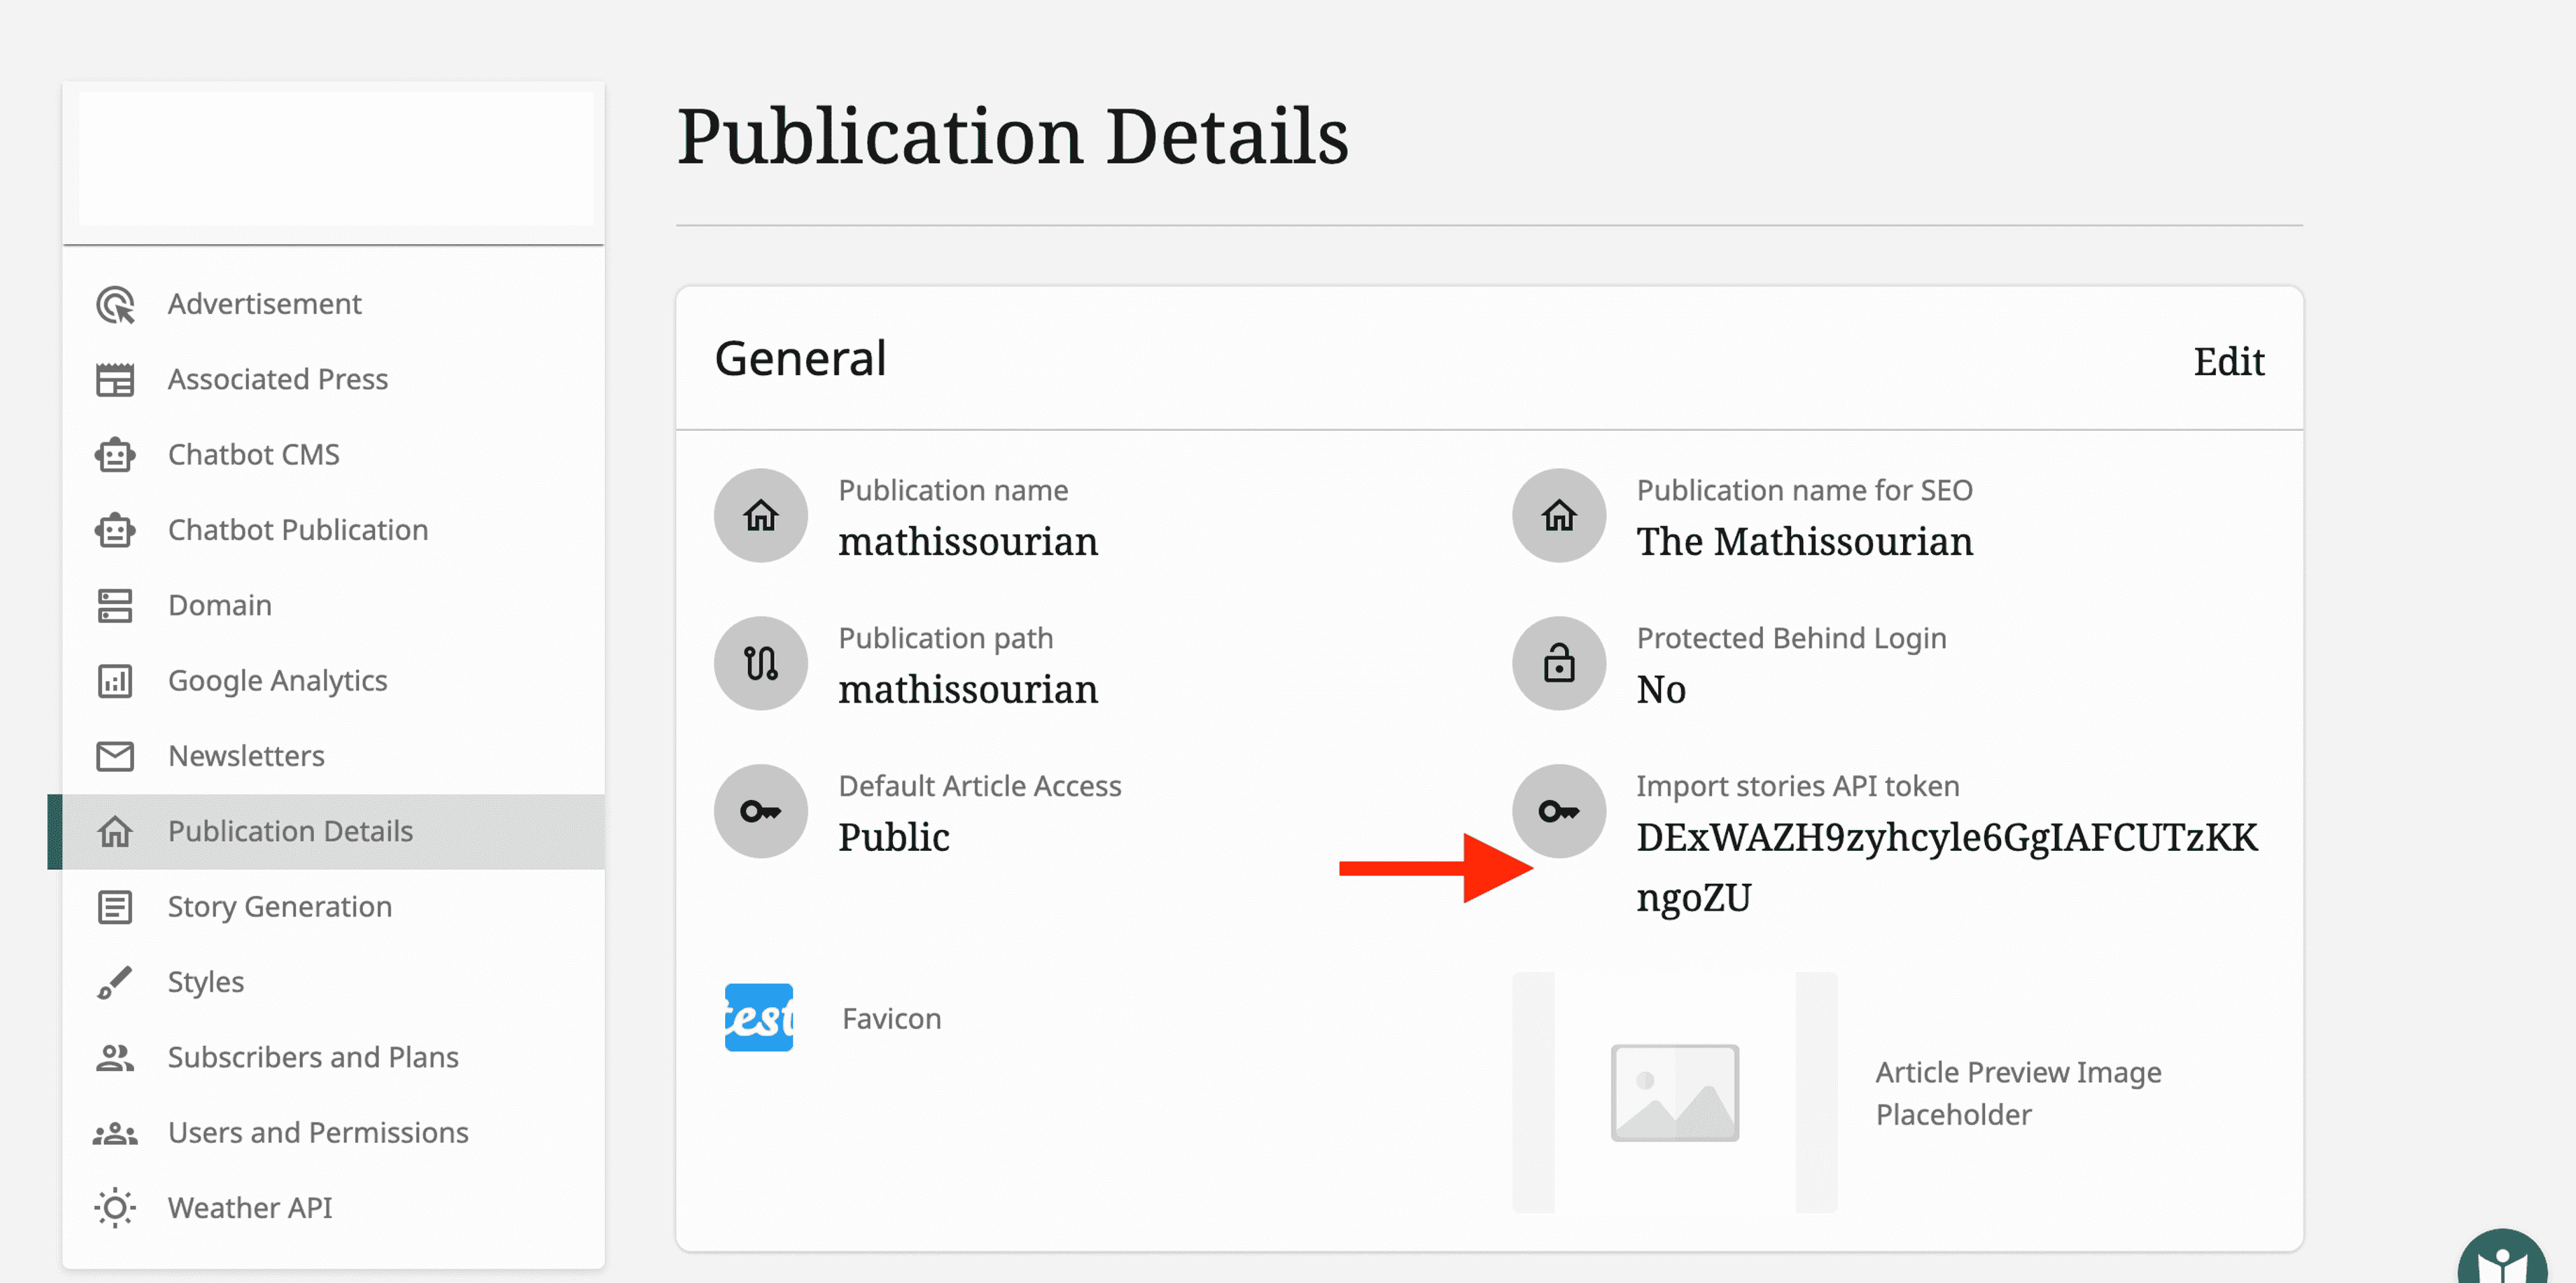
2. Make an HTTP Request: Use the following endpoint to get the upload URL and asset ID:
```bash
https://admin-prod.pubgen.ai/import/get-form-url?token=$auth_token
```
3. Parse the Response: Extract the `signedUrl` and `assetId` from the API response.
Sample Command:
```bash
api_response=$(curl -X POST "https://admin-prod.pubgen.ai/import/get-form-url?token=$auth_token")
signed_url=$(echo "$api_response" | jq -r '.signedUrl')
asset_id=$(echo "$api_response" | jq -r '.assetId')
```
Uploading and Importing Your Files
Once you have the upload URL and asset ID, follow these steps:
1. Upload the Zip File: Use `curl` to upload your zip file to the obtained URL.
```bash
curl --upload-file files.zip "$signed_url"
```
2. Start the Import Process: Initiate the import process using the following endpoint:
```bash
https://admin-prod.pubgen.ai/import/start-job?token=$auth_token&assetId=$asset_id
```
3. Check for Errors: Handle the response to confirm a successful import or identify any errors.
Sample Command:
```bash
final_response=$(curl -X POST "https://admin-prod.pubgen.ai/import/start-job?token=$auth_token&assetId=$asset_id")
echo "$final_response"
```
Automate with a Sample Bash Script
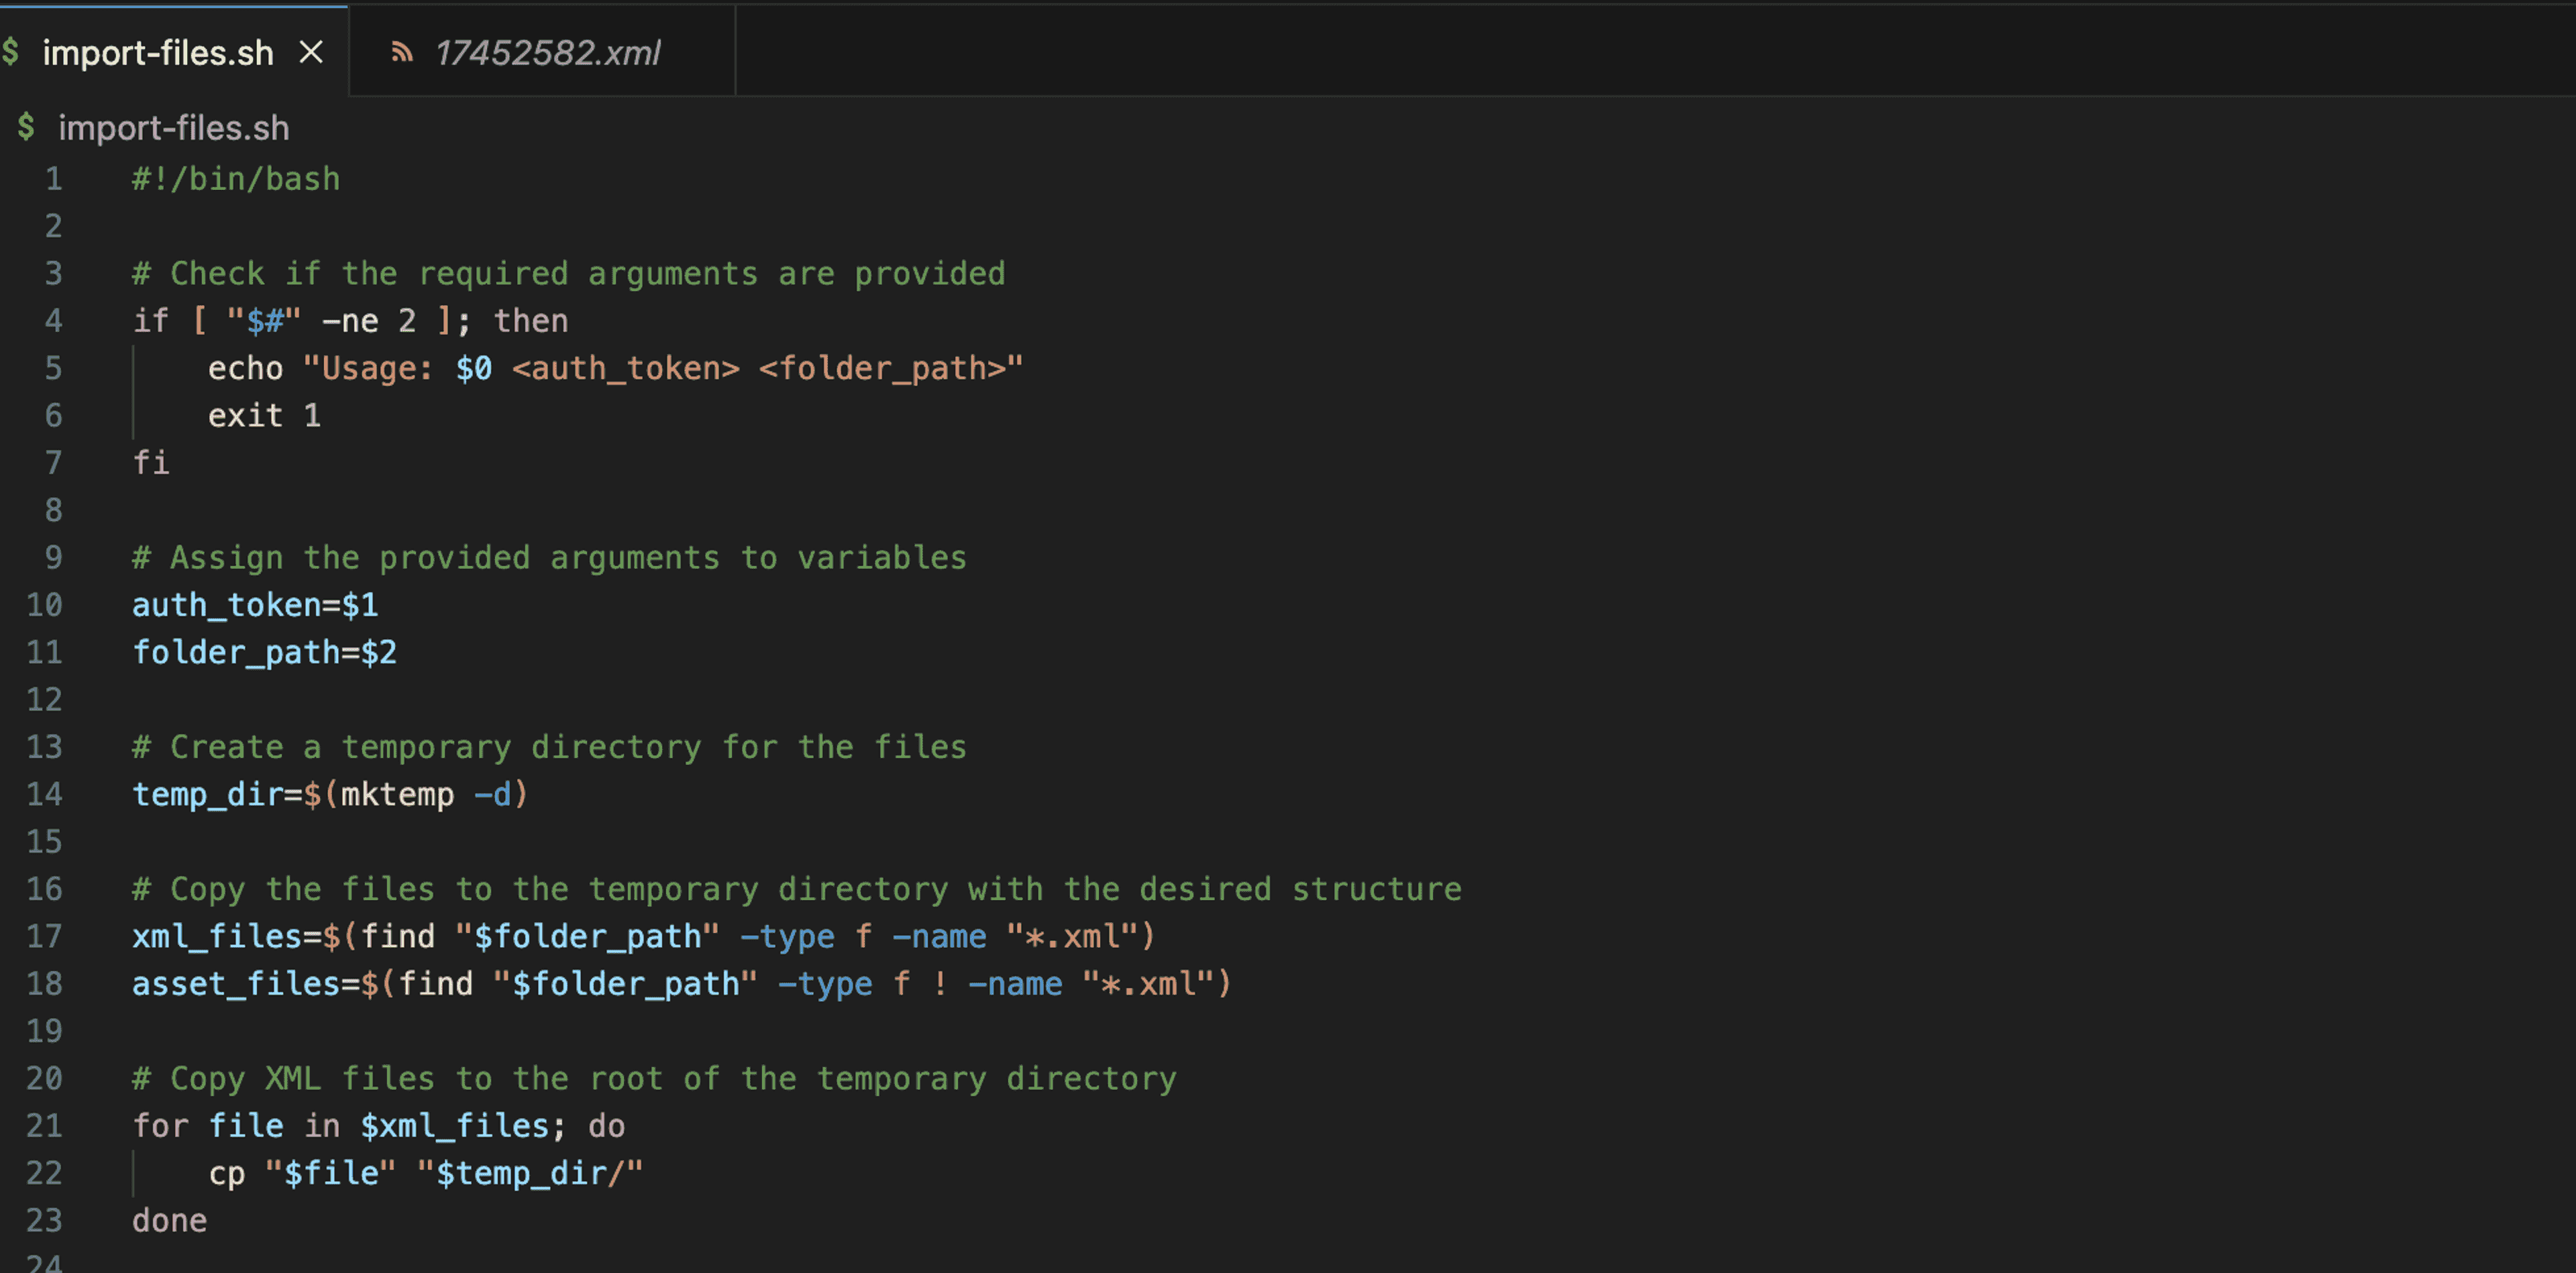
To make the process even more efficient, use this sample bash script. Save it as `import-files.sh` and run it with your auth token and file path. You can download the file here
```bash
#!/bin/bash
if [ "$#" -ne 2 ]; then
echo "Usage: $0 "
exit 1
fi
auth_token=$1
folder_path=$2
temp_dir=$(mktemp -d)
xml_files=$(find "$folder_path" -type f -name "*.xml")
asset_files=$(find "$folder_path" -type f ! -name "*.xml")
for file in $xml_files; do
cp "$file" "$temp_dir/"
done
mkdir "$temp_dir/assets"
for file in $asset_files; do
cp "$file" "$temp_dir/assets/"
done
zip_file="$temp_dir/files.zip"
zip -r "$zip_file" "$temp_dir"
api_response=$(curl -X POST "https://admin-prod.pubgen.ai/import/get-form-url?token=$auth_token")
signed_url=$(echo "$api_response" | jq -r '.signedUrl')
asset_id=$(echo "$api_response" | jq -r '.assetId')
curl --upload-file "$zip_file" "$signed_url"
final_response=$(curl -X POST "https://admin-prod.pubgen.ai/import/start-job?token=$auth_token&assetId=$asset_id")
echo "$final_response"
rm -rf "$temp_dir"
```
Enhancing Efficiency with PubGen
Automating the import process in PubGen is a game-changer for local newsrooms. By following the steps outlined above and utilizing the provided script, you can ensure a seamless and efficient workflow. Embrace the power of API-driven content management and watch your productivity soar.
